So, I got the new raider about a week ago and finally got to putting it together and painting it hopefully to have in the FLGS by launch day (Friday). I just had to put it up and talk a little about the kit.

First off, its complicated. Yeah, I've put a billion drop pods together and about half as many land raiders, but with this one, I can't stress enough how much you need to look at the instructions for it. (which are on a 8-fold front and back 8x10 piece of paper totally 14 pages of instruction pictures)
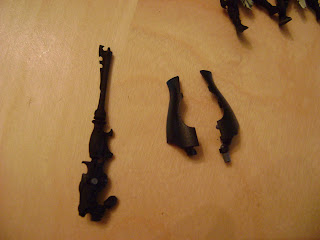
Secondly, this model requires a delicate hand to cut off the spru and to glue together. I usually cut the spru a few mm above where I would want it cut and then trim that off. When you cut the bit from the spru, it actually pulls apart just a little and cut and this will break these super thin bits.
So, after I cut and cleaned all the bits all I put together was the hull. I left a ton of the bits off for two reasons; transport and painting.
I left all the little spikes off that are around the front of the hull. I also left the trophies and the crew off to paint and then attach. I'll be leaving the crew completely unglued as use them to represent if there is a squad in there or not. Finally for transport purposes I left the pikes, the sail, the sail mechanics, and the front gun. All the items that I left unattached for transport will be forever unattached because the model is engineered that it's all slotted with pegs so they'll all actually snap in and out of place and shouldn't break as long as you're careful.
 Lasly, I'm a huge fan of really stretching my kits to the max. If you know me you'll know that I have a huge amount of magnetized models and even infantry. I like to pride myself in my ability to problem solve to get stuff magnetized but GW really made magnetizing this impossible.
 The guard comes in to peices and the gun attaches with a peg/hole to form a sort of lever. All I did to keep the ability to switch out these guns I just didn't glue the guard pieces together. I works really well and the gun itself is whats holding everything in place.
In closing, I just make a point for everyone out there that DE is for the veteran hobbyist. All its ting bits, its complicated construction and its incredible detail really require a desire to partake in the hobby side of this game. I can't stress enough that you really need to take your time to have this army look good. After putting this raider together, I promise you that there is be some very very shitty looking AND put together DE armies out there.

That's beautiful work and a great tutorial!
ReplyDeleteBrent
Love the paint job on them. The initial picture really made me think of Jabba's sail barge.
ReplyDeletenice start man. did you airbrush the hull for the base and shading or was it freehand?
ReplyDeleteaside from the faces and the loin clothes its 100% airbrush. I learned how to airbrush washes and glazes so that really helps get some amazing blends beyond just normal transitions of airbrush.
ReplyDeleteNot your though eh?
ReplyDeleteI think Phil said that the DE would be a finesse army. To have him and Jes invest so much and to be producing so many new lines all at once is amazing. I guess I just never realised it would go for the miniatures too.
How are you going to store/transport your raiders?
I am glad you put in the part about the level of hobbyists it requires to really have a good looking de army. Not only are they an army for players who have experience; but only an experienced hobbyists has the know how to build and MAINTAIN a proper de army.
ReplyDelete@airbrushing washes and glazes: Would you be so kind and write down in a few words how you used them and on which parts of the raider model you applied them?
ReplyDeleteCheer Karnstein
Shiny! Looks great!
ReplyDelete