

TJ here to update the Maulerfiend/ Spiked Beast conversion. A little more Green Stuff work went into the project last night and boy am I happy to be working with green stuff again! Let's take a look at the latest additions:


In the photo above, you can see that I added some more green stuff cables using my Tentacle Maker from GSI. This will help the front legs pair with the cable work that has already been added to the rear legs. I then went through and tied up a lot of the front end with some sculpting and some gap filling, making boils, smoothing out lines around the horns and covering up some spots that were knicked by my scalpel when shaving mold lines.

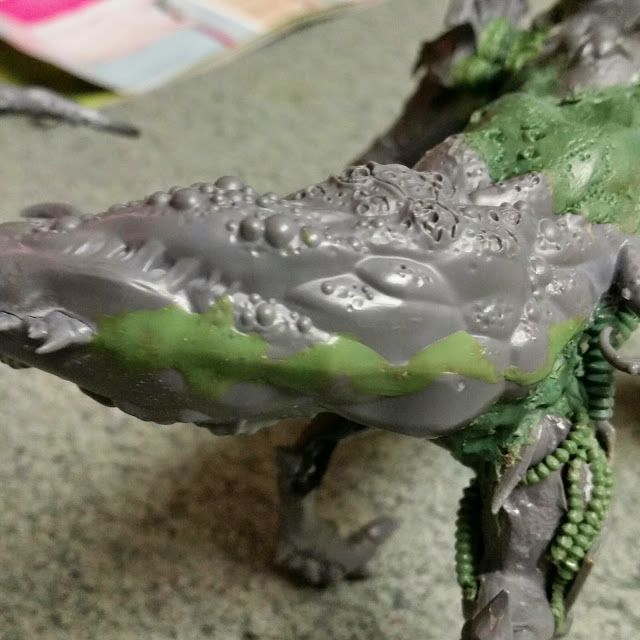
So here I wanted to add some smooth, raised areas to contrast some of the damaged rot below (which I may cover up as I think I went a little overboard.

The front end of the model is finally looking suitable to me after struggling with the project and almost scraping it in the beginning. I think the pads helped me realize where the front end could go and in the end I am happy I added them.

Here, the area around the cables is a little more tore up to match its surroundings and I will have to consider contrasting that along the rest of this side of the model so I don't get too much of a mottled effect once the model is painted.

Then there is the ever necessary gap filling work that must be done!

Here is another front end view of the model. The predatory cat image that I wanted to evoke is starting to come together and I am liking the stance and the motion. Once the base is added, the model will likely be tilted down slightly to catch the trot that cats do when not quite running (maybe it is called a lope), but essentially, I want it to look like she is either loping or has just run down prey (likely under the open hand) and is roaring a challenge to another potential prey (hence the tongue out, open lamprey mouth).

The last thing I want to touch on is the rib structure. Last time I know I made some molds and talked about using those bits, but once they were on, I just hated them. So now I have sculpted a chest and rib structure, which will be sculpted over. I want to catch the shape of the rib cage as you would see on a shaved cat and possibly get some peeks through the skin at the insides (which is why I textured the ribs or indented them in spots. Once this is covered by the final layer, it will all make sense (trust me).

Above, we can see the shape I wanted the rib cage to add to the otherwise worm shaped model.

And here is a view from the other side.
That is it for today. I look forward to getting down on this model a little more this week and into the weekend, so be on the look out for more on this project in the future. Feedback and comments are always appreciated.
This is looking really cool. I love the textured effect you have on the body parts you have sculpted
ReplyDeleteThank you very much.
DeleteLooking really good. I like the newer version of the ribs. The stalking look is really well done
ReplyDeleteThanks. It wasn't something I thought I would have to do but now I really like it.
DeleteLove it man!!!
ReplyDeleteI have to catch up with you, GB!
DeleteThe texture is great, and that ribcage is going to be so awesome. All this work is going to really pay off and give you an absolutely amazing centerpiece model!
ReplyDeleteThankS Greg.
Deleteawesome conversion work there! Very impressive!
ReplyDeleteThis is pretty much amazeballs. Yep.
ReplyDeleteFrakking WOW, dude!
ReplyDelete