

One thing that has really put in me off lately from 40k hobby is not feeling settled. I've been in the upheval of my life for almost a year now and things are looking like they might finally settle back in. This year was one of the hardest of my life in which I came out alive and well and a better man for. I want to get back on that horse and start doing great work agian. This is my step one back into the light.
I love airbrush. It gives great results, everyone loves an airbrushed army, and with as much time as I've lost painting this past year my plastic armies have really stacked up. I need something to churn out good table top quality quickly. Step one to getting back; fix my airbrush.

Put simply I was tired of my 60$ Harbor Frieght compressor. It was really inconsistent and over heated after long sessions. For 60$ the guy was a trooper. I'd still recommend it to start out with, but I'm to the point now where I need something better quality because I'm starting to notice the small things a nice compressor would give me.
For the project I bought an 11 gallon portable air tank, a bunch of connectors, loctight and a regulator. Without going into too much how-to detail I set up this tank to have a valved air intake and a regulated output.

I connect it to my shop compressor that hangs out in my garage where no one can hear its crazy loud pistons banging and run the airhose in the cracked door and down to the basement.
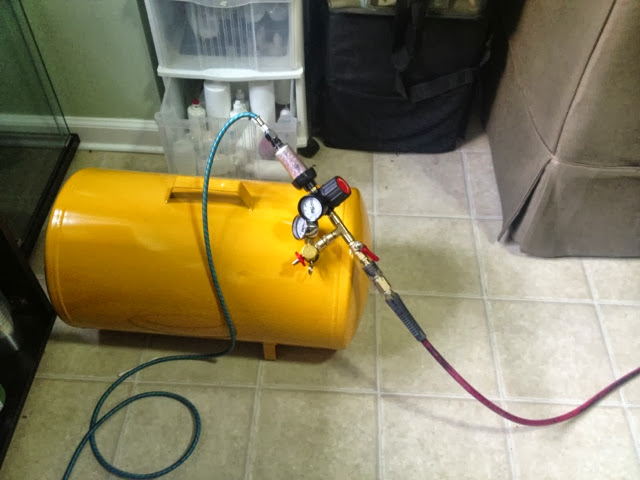
I regulate the air compressor to put out 120 psi (max of the portable tank), keep the valve open so the compressor can fill as needed and regulate the output of the portable tank to 20-40 psi for the airbrush. Its really simple, mildly make-shift, but much better than my airbrush compressor. I've been using it for a week and have zero complaints about the set up.

Pro's and Con's
Pros:
Consistent pressure
No moisture (usually traps in the aircompressor tank, if not it travels to the portable tank and is trapped there, if not, it gets trapped in the moisture trap)
Air pressure from 0-120 psi (only ever had it up to 60psi to clean the brush)
Long time between the compressor kicking on.
Cheap (tank set up with everything was 70$ and I think the compressor was 100$)
Doesn't over heat, these compressors are designed to be work horses
Cons:
Requires a place for you to put a loud compressor
Having the airhose running in the garage door and down the basement pisses off my wife sometimes
Bulky, doesn't travel well at all.
I've done a lot of posts early in my blogging day that said 'you have to do this!" and looking back there are some I feel bad for and some I feel down right stupid for (flow aid to lubricate your tools for working with green stuff?! Fucking seriously?!?!). So I'm not going to say 'you have to do this!" but I will say that this works well for my situation and might work well for some other people out there.
Glad you've solved the compressor problem on a budget! Good luck with the new projects, and spare a thought for those of use trying not to piss the wife off in a one bedroom apartment ;)
ReplyDeleteGlad you've solved the compressor problem on a budget! Good luck with the new projects, and spare a thought for those of use trying not to piss the wife off in a one bedroom apartment ;)
ReplyDeleteI learned that a compressor in the back of an SUV is surprisingly quite. But that's some serious ghetto fix there. Plus I was afraid my car was going to be set on fire by it some how. Just made me nervous.
ReplyDeleteOtherwise, you're just going to need to save your pennies for a good airbrush compressor with a tank or a compressor and pick up a little portable shop tank and rig it up like I have.
Good post. I ended up replacing my old compressor and spent the extra cash on the Grex AB+compressor kit. It was not cheap but it's quiet as a mouse and I think I'll get good use out of it for a long time.
ReplyDelete