
DFG Cribs: CVinton's meth lab.

To start off with I uploaded this picture xlg so that you guys can really see everything and feel free to ask about anything that I don't mention in this post. There is a lot to cover and I'll try not to ramble, but just as a warning, this is a long post, filled with a ridiculous amount of pictures.
OST asked me to do a 'cribs' review of my work space and I'm happy to oblige. Every time he comes over he'll see something weird and ask what I have that for. It usually gets a response of 'omg, are you serious?!' We think a little tour of work stations can inadvertently inspire and educate people of tips and tricks others take for granted. Hopefully we can be successful in that mission statement. Here we go.

I made the paintbrush holder out of super-sculpy. Rolled a ball, flattened it, stuck brushes in it, wiggled them around a little to make the holes slightly larger than the brushes, baked it (with the brushes in it of course) and viola, brush holder.

 This is my bits box. I bought these plastic bead organizers from Micheal's when they were on sale for $1 each. Totally worth it. They fit loosely into the milk crate and work way better than a cardboard tank box. I've put all my bases in them as well for easy access as well as all my magnetized bits for my IG army for safer travel.

 Yet another Micheal's buy. These are stack-able bead organizers, but when combined with wet palette sponge and paper, they are cool stackable palettes. I cut a ton of extra papers so I'll be set for a while. Careful, they get moldy though if left too long.
 Here's a shot of most of my 'chemicals' I use. Vallejo still water for snow, water and blood effect. Great stuff. Winsor Newton brush cleaner; works really well, can't soak for too long and be careful because it will eat the paint off the brush handle upon contact. I have a small bottle of hair conditioner that I use on the brushes after I clean them with this. Pink soap; good soap to wash brushes with. Badger airbrush cleaner. Mold release. Super glue. Instaset; the bigger bottle is actually a 8oz bottle of it that my local RC shop sells for 10$ to refill the 2oz spray (that costs 6$, do the math...). Testors plastic glue; I just started using this and think its pretty awesome. Not for the impatient and I recommend having tons of rubber bands to help hold stuff. Testors Dullcote. Aerion from Team Snake eyes recommended this to me and I'm really glad he did. I love the stuff for sealing models. Liquitex drying retardant, liquitex flow aid diluted in a squeeze bottle. Behind all of that stuff is picnicked squeeze bottle of windex, gesso, matte medium, glaze medium, ect. basically stuff from liquitex that is cheaper (and unwieldy) in giant bottles.
Porclin palette. A must. Stop buying and throwing away plastic ones. Its worth the extra money to just spray it with the kitchen sprayer and lightly brushing it with your cleaning brush.

My wife uses...clear care I think it is...for her contacts. She saves the bottles for me and I use them with thin liquids like water, flow aid, windex, rubbing alcohol, and simple green. I'm a fan because it sprays out pretty forcefully and most of the time I'm using it to rinse out my airbrush so the turbulence helps that.


Another great Micheal's find. Also bought on clearance for a few dollars. I think it was 9 feet of chain that great for 28mm.


Pipe cleaners to make barbwire out of. Also, I use it to clean out the airbrush's main body. Of course...on sale at Micheal's.

 I happened across these when I was cranking out objective markers. I had bought a few cheap online for life counters for magic the gathering. Since they've been collecting dust I decided to use them as objective bases because the chips are only a sliver larger.
Refer to the testors plastic cement. I've heard people recommend using them and I was never sold until I tried it. It really helps reduce gaps on bigger models like tanks or trygons. Give it a try. I picked up a giant bag for cheap at staples.

Ground up pastels for weather powder. Works as well as brand weathering powders to just dust up some boots or tank treads.

Bamboo sushi mat is a great way to store paint brushes. It keeps them horizontal, so water doesn't drain into the wood handle, and because most of the time the handle is tapered fatter than the ferrule it keeps the hairs from bending and breaking. Just lay them out flat and roll it up.

Tamiya weathering kit. The soot out of this is great for exaust. It also does a great job of sooting up boots. The powder is super fine and almost oily to help it adhere. I had to pick up some replacement make-up applicators since the one it came with was quickly destroyed.

Here is a quick look into one drawer. Mostly spare containers of basing mix. The salt is for salt chip weathering, woodland scenic flock for basing, all my super cheap folk art paint and anything else I can't really find a home for goes here.
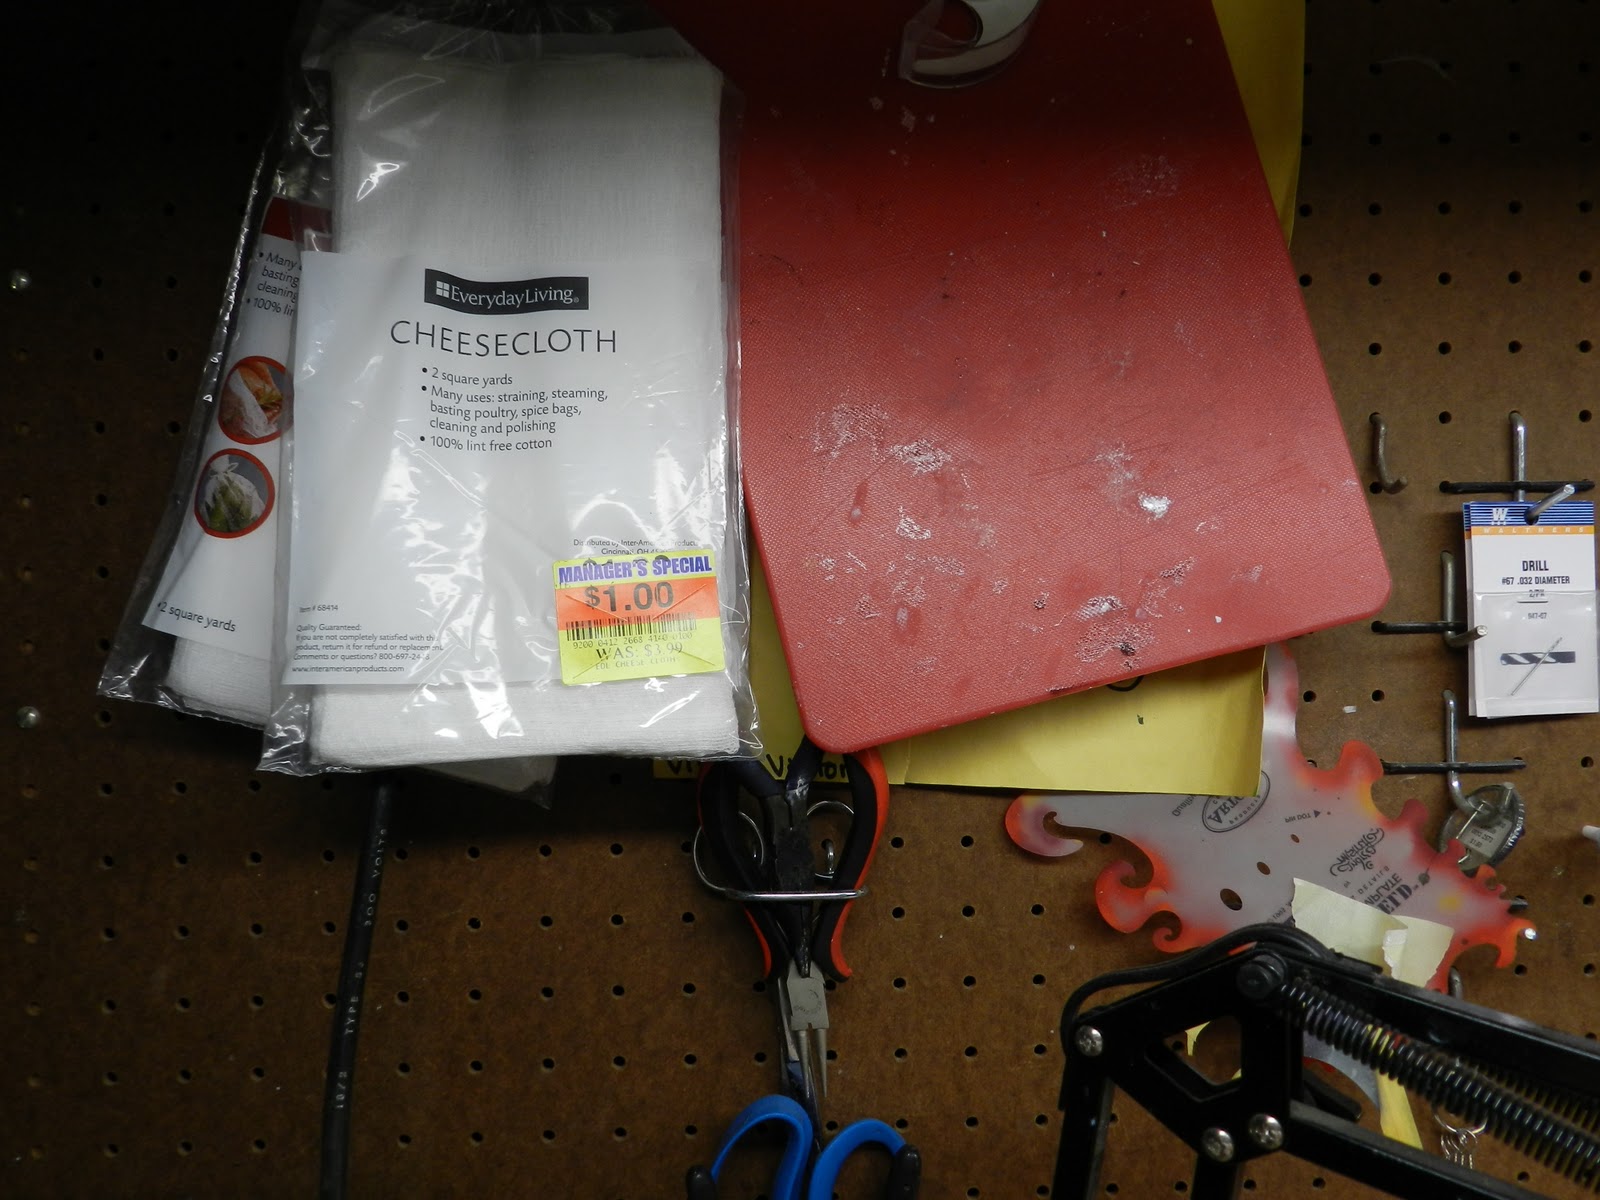
The wife got after me for using the cutting board. I use it a lot when I'm cutting stenciles or masking tape. The cheese cloth is great for camoflague coverings. A few tea stained (yeah, its done exactly like it sounds) layers and some watered down PVA glue then drape it over what you want camo'd and your good to go. Yeah, that's a managers special for $1.

After the airbrush, the Dremel was the best hobby investment I've ever made. I'd recommend it for sure. The battery still hasn't given out on me and I've had it for almost 2 years. The grip is great for small models over the traditional style. I use it a lot too for pinning; I couldn't imagine doing that without this tool.

Water based oil paints. Cool for water run off rust and weather effect.

It might be OCD but I store my transfers in a plastic baggie. It keeps them together, in good shape and from getting wet.

I have a bunch of different pillars. Needle nose, jewlers, large tweezers, small tweezers, scissors and spru clippers. The weirdest ones are the jewlers and I use those for chain (see the tutorial).
I just wanted to mention with this picture that its better to store green stuff on its side while still in the tube. It keeps it from settling and sticking together.

I have one of those magnifier glass desk lamps. one thing I like is that I can stick magnetized bits I'm painting to it so they don't get lost in my stuff on my desk. Its also nice to help see what I'm painting better, but hopefully the fact that it emits light gave that part away.

The Micron pen. I hope our readers know how much we here at DFG love these pens. They're great for writing on purity seals or if you ever need a super fine line. Where do you think I got it...yeah, Micheal's. (I swear I don't own stock)

Now for whats in the drawers. Its pretty much junk that has no other home.
First, a lot of throw-away brushes. Save your good brushes by not using them if you don't need to. Why would you ever paint terrain (unless you're a baller) with your sable brushes??

Pin vice. When the Dremel is overkill, I break out the old school pin vice. But I'm lazy, so it's pretty dusty. Still, no hobbiest worth his stuff would be without one.

I pick up a few coffee stirrers everytime I'm in a gas station. Terrain, pipes, whatever. I like having various sizes and in my experience no two coffee shops (unless they're both speedways and even then..) have the same size straws. Also, you can use them to create pustules in green stuff, google it.

When I got more into terrain and board building I needed to pick one of these up. I like it, I've found it useful at time I wouldn't have thought. Any time you're cutting anything thicker than like 1/4 you should be razor sawing it if you want it done well.
 My handful of sculpting tools. Though I'm not that great at it, its my next venture in the hobby world. I forget the site but there is something that was recommended that sells the best tools, all hand made but they're $25 per tool and they only have a tool on one end. One day I'll be a baller sculptor but until then, my sculpy tools will work fine.
My wife and I were shopping for new kitchen counter tops and they sent us these samples in the mail. They're free, you can get as many as you like and they're the exact size of a rhino. Therefor perfect wreck markers.

I don't find myself using this often, but it has some terrain uses. The stuff is serious when you glue something with it. It doesn't break apart; the stuff you glued together breaks. The problem is that it reacts with water to bond and that reaction causes it to expand. I saw a tutorial on using gorilla glue just spread around and heavily sprayed (it expands more wither more water; less with less) to create some kind of cooled lava flow or something. it works but is very unpredictable.

Here is my basing mix. I went through the floral arangment section of Micheal's and grabbed up a few different sizes of sand/pebbles, took them home, poured them in a big bowl and mixed it all together. Its easy and great basing material. Next time you're outside look at the dirt, is it all the exact same size? Why is your basing material then? (OST here - You're welcome)
 Heres the mix in actioin. primered grey, one wash of bursley heavy black wash and bam, done. You could go back over with a lighter grey if you wanted. but its not necessary as long as you break it up with the static grass patches. Otherwise yeah, its too uniform in color/tone.
Here is something you can do with yoru sprus if you're not recylcing them otherwise. Clip them up, at them to your basing material if you're doing city rubble. Bricks, rusted steel building structure, gold bars, whatever you want it to be, its something crafted and broken and works well to make it look like city rubble versus open plains rubble.
 I also keep all of my floor tile I break up when basing. I use the smaller for basing armies or terrain. No reason to just throw it away.
Managers special, again. It was end of summer and they were practically giving away these disposable grill grates. They're cool on bases as a sort of rockcrete infrastructure.
And that's pretty much my crib. hope you took away some tips, if you have any questions about anything feel free to post up. Thanks for not TL:DR'ing this!
Nice, great segment. Definitely inspiring. I love that you have a bottle of jag and a little gnome.
ReplyDeleteThanks for the useful tips! I love looking at other people's work spaces. It always gives me inspiration on how to better organize my own.
ReplyDeleteMy friends were inspired by Amelei and stole that gnome for a summer while they traveled around the states. The jager has been untouched because I've had a shortage of red bull.
ReplyDeleteI'm glad to inspire, and I too love work space posts. They're awesome because its a boat load of true tips and tricks.
Awesome post! I wish I had my stuff organized like this, but its all on a shelf and I pull it out and paint on my table in the basement while watching TV.
ReplyDeleteI just want to know what that is in front of your TV in the first shot. I tried to blow the photo up in Photoshop and still can't tell.
ReplyDeleteIts one of those resin anime 56mm figs. Its a commission. Also...see that the defiler is primed....oh yeah...
ReplyDeleteWow, thats a really nice set-up. I'm in the process of designing what the new layout for my study is going to be and I will definitely be borrowing a few ideas from your crib.
ReplyDeletePlus, there are some really helpful tips here on what to buy. So thanks for those
Wow this blog is very nice …
ReplyDeleteExemptions of House Rent Allowance HRA
Thank you for sharing a nice post. Keep up the good work.
ReplyDeleteRam Power Wagon
Wow this blog is very nice …
ReplyDeleteLIC Health Insurance Plans: Benefits Features