


Old School here,
.With my Tower of Skulls conversion commission done and over with, I can now talk tutorial, because what is the point of being able to make something this ridiculous without sharing how it was done so that some other guy can build one and improve on the method! This first article will cover the materials I used and how I got started. The reason I am doing this is so you can see what is involved and what kind of costs might be involved in taking on this project.
.Here is the material list:
.Weapons:
.I used a 1/4" diameter PVC pipe for the cannon (this is the largest size that will still fit through the basillica window). Available at your local Hardware Store!
The top guns in the tower are Twin-Linked Lascannons from the Land Raider kit, available from Horde O' Bitz on Ebay, Battle Wagon Bits (little pricey) or the Land Raider Terminus Upgrade kit from GW's site ... or, in your bitzbox if you are like me!

The Large missile launchers seen in the photo are the Multiple Missile Launcher available for about $9 from Armorcast's Sci-Fi line on their web site (google it). You could use Thunderfire Cannons like in the Apoc Book, but I chose to keep it cost-effective.
.The little heavy bolters already attached to the Bane Blade Chassis work very well for the Tower's small Skull Ripper guns, so I left them there.

Finally, for the guns you will need to dress them up so they fit in with your Chaos Army - this means evil gargoyle heads! I used the evil gargoyle heads from the Chaos Land Raider kit to fix the guns; The longer Dragon-type heads for the big guns in the tower and the small dog-faced ones for the HBs.
.
.
That takes care of the weapons, let's talk Chassis:
.Obviously, you want to pick up a Bane Blade for the main Body of the Tank!

Next, you will need some parts to make it fit the Chaos Theme, this is where I used more parts from the Chaos Land Raider kit to suit my needs. Used two of the skull-panels and the nice (land-raider exclusive) spiked ram for the front of the tank and added 4 of the gargoyle headed vox units under the lights - Once again, all of these could be in your bitzbox, but if not, then order them peice-meal from Horde O' Bitz or somebody like that to get what you need at a reasonable price.
.
The curved spikes I have used as wheel guards and for the front of the tower to hold back the skulls comes from about two boxes of Corpse carts from the Warhammer Fantasy Line.
.Now let's talk Tower:
For the tower, the client wanted it to look like it was FILLED with Skulls, so the I HAD to get my hands on some Basica Administratum Skull Walls - the only problem is that only two of those wall panels come with each Basillica and this job calls for 8 of them! Once again, bitz ordering them via Ebay with Horde O' bitz or another bitz seller is the way to go! If not, you would be looking at nearly $100 in Basillicas alone!
.Next, I used the denomic faces and skulls from the Warhammer Fantasy Battle Arcane Ruins kit for the demons above the guns on the tower and for the skulls above the regular panels (some skulls will need horns cut off of them. Once again, this is something I could pull from the bitz box or you could order from a bitz seller or could get by buying the kit directly.
.Another Evil face I used front and center, on top of the tower was the Big Round Demon face vomiting skulls from the Ogre Kingdoms range. It really made the whole project for me as it has so much character - once again, this is a piece I ordered from Horde O' Bitz.

On the top of the tower, I used various spiked racks from the Chaos Vehicle kits along with some random impaled helmets from the Chaos Champion Sprue found in the regular Chaos Space Marine box sets.

Additional Needs:
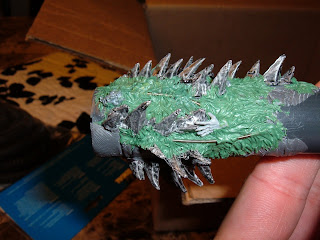
.This project rquires a ton of skulls and skulls do not run cheap in this kind of volume if you are trying to buy them from GW or even from an Ebay Seller, but if you have $10 and a dremel or a skill saw, then you can easily side step the need for AS MANY individual skulls. I got the bulk of the skull surfacing done on top of the tower and on the chassis by using the Skull Road kit from the terrain section on Armorcast's web site. The panel they send you is over a foot long, about 6 inches wide and is made of resin, the skulls have a decent amount of deep detail and are scaled to fit in with the 25mm-28mm range we have in 40k - so this is a key buy if you want to make this look good AND keep the price down!

Next is both Green Stuff AND Grey Stuff. The reason you need both of these is because there are parts of this project that require a more pliable and softer drying sculpt like green stuff and times where you will need more hardy and rigid-drying sculpting materials like Grey Stuff and I will cover all of that as I get to those areas in the tutorial.
.Even more skulls! That is right, there are going to be gaps in the skull road pieces once you get cutting and you will miss the 40k feel without some skulls and helmets from the 40k range, so get your hands on about 8-12 Space Marine Helmets, about 20+ skulls from fantasy (or from the chains found in chaos vehicle kits)
.Plastic card - You will need plastic card or any other thicker plastic material to base the tower on the BaneBlade Chassis and to create the skull broth effect at the back of the tower. It is also good for fixing gaps and any other spot-repair during the project.

The tools to do the job of course! I used a power Dremel (not battery, but plug), a pin vice, Brass Rod, a hobby knife (about 5 blades), a set of sculpting tools (noth rubber tiped and metal), Brush-on Super Glue (I just prefer brush-on, but you will need multiple tubes), a flush cutter and plenty of caffiene!
.
So to recap, that is:
Dremel
Hobby Knife
Super Glue
Sculpting tools
Pin Vice
Brass Rod
Plastic card
Green stuff
Grey Stuff
Flush Cutters
1/4" inch Diameter PVC pipe
2 Multiple Missile Launchers from Armorcast
1 Skull Road from Armorcast
2 Twin linked Land Raider Lascannon Sponsons
Gargyole heads , spike racks, spike ram and panels from Chaos vehicle box
Ogre Kingdoms Daemon Face
Fantasy Arcane Ruins Skulls and Daemon faces
about 50 extra skulls and helmets
4 Curved Spike racks from 2 corpse cart boxes from warhammer fantasy
8 skull walls from the basillca administratum box from cities of death
3 window walls from the basillica administratum box from cities of death
A BANEBLADE
... and some caffiene ... check that ... I think a pony-keg of Rockstar or Monster may be in order ... and I think that is it. This has been the most badass conversion I have ever done and I am very happy with how it turned out and I think my client is stoked too. Thsi took me a total of about 16 hours to build (man-hours, not actual hours) and I would rate it as an expert kit, so if you are new to Green Stuff or large scale conversions, I would recommend smaller projects first like converting existing tank kits or a brass scorpion from defilers to get you up to speed with some of the stuff you will need to do - or you can follow along and try it out anyway! Feedback, as always, is welcome!
Great looking tank, and spiffy write-up. My only suggestion would be to make the pictures linkable, as many are small and hard to make out the details on.
ReplyDeleteVery cool looking stuff there. I'll certainly be stealing many of these ideas when I do my own build!
Outstanding work mate and cracking write up, can't wait to see it painted.
ReplyDeleteWow!! What an amazing project and work in progress. Totally impressive so far.
ReplyDelete