Saturday, November 28, 2009

Chaos Space Marines Units and Tactics: Chaos Bikers


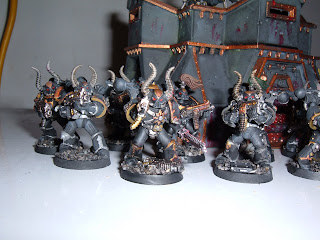
It is now time to cover Chaos Space Marine Bikers! First off, I would like to show off this lovely model posted on Dakka by FU 2000 here: http://www.dakkadakka.com/dakkaforum/posts/list/229484.page Superb Work!
.
Alright, with the photo credit out of the way, it is time to cover Chaos Bikers.
.
I feel the need for speed: Chaos Space Marine Bikers like all bikers can turbo-boost for a 3+ cover save. This means that they can take a lot of turn 1 fire if you go first, they can contest objective for a little "Turn 5, I win" action as well as a few other tricks they have up their sleeve. With their points cost being a little on the steep side, it is important to make sure your bikers have a dedicated role in your army so they do what you paid them to do!
.
Vehicle Hunters: Chaos Space Marine Bikers can field 2 melta-guns in their squad regardless of the size. Combined with a good turbo-boost and you can start frying vehicles on turn 2 with extreme prejudice. This squad taken at the minimum points cost weighs in around 119 and has one benefit over the minimum termicide and chosen units (Chosen outflanking): You know that they are on the table and you know where they are going to be (if they live). This unit will draw a lot of fire and the 3+ save is no garauntee that you will get there, so try to get into a good spot and avoid massed fire when approaching your target and if they die, make sure the units that didn't take all that fire that was dumped on the bikers, make it worth the effort.
.
To make this unit a little more survivable, I pump up the squad number to 5 and either leave it at that or take an icon of Chaos Glory. I really try to keep it cheap as I do not count on them surviving long.
.
Daemon Bomb: A common tactic for Chaos Bikers to make them a mobile Daemon delivery system. This works well due to the turbo boost that could possibly put a Greater daemon or a squad of Lesser Daemons into the enemy ranks on turn two. The cost of the GD is 100 points, add that to the 48 points you will pay for the bare champion and ask yourself if it is worth it. If you think it is, then try the tactic out. If you pull it off it can be devistating.
.
The vehicle hunter unit works very well for the daemon bomb. If you are using lesser daemons, then crack a transport or two turn one and have your bikers in position. Hopefully you will get your daemons in for a charge, allowing your bikers to roll off to pop more vehicle. The Greater daemon will allow you move and maybe use him to pop a big tank or at least cause the tank to move and sacrifice its shooting for a turn.
.
My thoughts on the daemon bomb is that it is very situational and requires some finesse. It also often means that you are putting weaker units (I consider the GD a weaker unit) ahead of your army and out of mutual support range. You are also counting on those daemons coming in and when you count on dice going your way, the Dark Gods laugh at you! At least that is my opinion.
.
Bikers as Assault Troops: I have the same problem with using Chaos Bikers as assault troops that I have with using regular Space Marine bikers for that role: There isn't enough of them to put out enough damage to survive combat. Sure they can cut down straglers and should do so, but assaulting full squads will often end badly for you. If you want them to be dedicated assault troops, then you will have to pay for it!
.
To properly kit them out for CC, you will need to powerfist (to do enough damage to help you in combat resolution), you will need 5+ bikers (to have a volume of attacks on the charge and for survivability) and I recommend the Icon of Nurgle. The Nurgle Icon will make you T(6) and will make you that much more survivable in close combat and to shooting on the way there. This unit can also be pretty nasty with some flamers and either a lord or a sorceror. A lord with a Daemon Weapon or lightening claws can make a nice damage sandwich with the powerfist involved and will help you win combats very well.
.
A fluffy sorc would be a nurgle sorceror with either Nurgle's Rot (could be a CC beast) and a very unfluffy choice would be a Lash Sorceror. This would allow you to push and pull units all game and he would be insulated in a decent meat shield. For the Lash Biker squad, I recommend just taking the nurgle icon, no champ and maybe the meltaguns or flamers.
.
A note on Icons: Note that I left the other Icons out of the tactica so far. Let's take a look at them;
.
The Icon of Tzeentch is probably the worse choice in Icons for the bikers as it gives them a 5+ invule (a hail Mary shot if you ask me), which you can do better that with a boost save in most cases. The Icon of slaanesh will give you I5, which seems like it would help you in combat, but the problem they have is model count; there just aren't enough bikers doing enough damage to really make that I5 worth it. Volume of attacks leads us to Khorne: This is a runner up behind the Icon of Chaos Glory and the Icon of Nurgle for me. The thing is that the model count is still a little low and I would only take it if I knew I was fighting an enemy with weak troops who couldn't handle T5 very well and would die to W4 S4 easier than a basic space marine.
.
This leaves us with two choices for icons in a take all comers environment, both of which I covered above.
.
Overall: I like Chaos bikers for either a cheap and disposable anti-tank unit (3-man, 2 melta and spammed) or, in large point games played for fun, I like the CC version with lords and sorcs for the fast assaulty feel of them.
.
If you haven't used them yet, playtest them and see what layout works for you and if you have some good experience using them, share your sage advice with us, feedback is always welcome.

Friday, November 27, 2009

Tanksgiving Artist of the Week: Rene


This week's Artist of the Week has a theme in honor of Tanksgiving. Let's see if you can guess the theme ;)
.
Rene has some of the tightest freehand skills I have seen on the Web and this artist's work can be seen on Coolminiornot, Dark Fortress and at Chest of Colors. Now, I don't want you to walk away thinking that that is the only thing Rene is capable of painting, check out the Artist's gallery at CMoN here: https://www.coolminiornot.com/browse/page/1/submitter/rene/orderby/Descending
.
If you are having trouble with the images on my blog, just click em', they get bigger!


Chaos Space Marines Units and Tactics: Raptors


This next entry in the Chaos Space Marines Units and Tactics will be about Raptors! First, I would like you to take a look at this Jump Pack posted by Brother Nihm at B&C. A pretty good idea I think, though the photo was the only thing he posted as far as how-to.
.
Chaos Raptors
.
Chaos Raptors were once a glorious unit to bring upon the field, filling the enemy with fear and delighting Chaos players everywhere, but that was a long time ago. Raptors have since been laid low to mirror a sort of Chaosy Assault Marine. That does not mean the unit is without its uses on the field.
.
I'm Up, They See Me, I'm Down: The Chaos Raptors are jump infantry and with that comes the lack of a transport, so in order to use them effectively, the first thing that must be discussed is the proper use of cover. Keep in mind that if they jump into difficult terrain, they must take a dangerous test, so it is often more beneficial to hop behind rhinos, buildings, Land Raiders or anything else that denies line of sight until it is time to deliver the killing blow.
.
This means that, at times, terrain is going to dictate your stategy. I tend to deploy in a spearhead in most games and this is what I recommend for the raptors as it will allow them the most cover.
.
The MC and Vehicle Hunter Unit: One of the ways Raptors can be used is to hunt vehicles and mostrous creatures. To do this, I recommend arming two of them with either plasma or melta (in a take-all-comers environment, I prefer melta, as there are more scary vics than there are MCs for now). You can run this squad behind your objective takers and when the enemy is ready to make his move, you can jump up and take out his walker/nasty vehicle with ease and make your troops' job a little less stressful. The enemy will also take note of this and either hold off on bringing those units toward you (controling his movement: a great way of pinning his units down when you also have great firing lanes with your Oblits ect.) or he will try his luck and possibly get blown up.
.
When attacking an objective, this unit can also help add to the assault, allowing your troops to rapid fire while your raptors jump in and assault leaving his unit to get assaulted the turn after by your troops. For this type of Raptor unit, I leave the squad bare except for the melta guns, they need to be cheap and of minimum size to allow me to field my other units optimally and I may run two squads depending on the type of army I am fielding. If I can, I might put an icon in the squad in the event they take some cover-denying fire, I would hate to see them run before they get to do their job.
.
Assault Raptors: Other than vehicle hunting, Raptors can be a decent little assault unit. In this role, you can take or leave the meltas depending on how much you want to pay for them. If you really want to be assaulty, take the two flamers (preferred) or two plasma(just remember that you cannot assault after rapid fire), a champ and either the lightening claws or the powerfist.
.
The lightening claws will help you do more damage on the front end and if you are going to take them, then you will probably want to take the Icon of Slaanesh (to get the first hits on anyone but Eldar and DE and ICs) or khorne for the higher volume of attacks. In this case, Slaanesh is a little cheaper and would be a good fit for the unit.
.
A powerfist is a good choice as well for Raptors as it can harm walkers. When given the mark of Khorne, it will allow your champ 3 attacks with the PF, which can get you the win in close combat and gives you a better chance of hurting walkers and monstrous creatures. This is my prefered layout for the champion.
.
The same basic tactics apply for this unit as the vehicle hunter unit, bound behind vehicles and LOS blocking cover (use the flamers if needed) and unleash the assault when the time is right.
.
Deep Striking: Deep striking your Raptors is risky, but can effectively drop vehicles. The problem is that there are cheaper units for that (Termicide squads) and in the case of assault, they are often better off starting on the board, if for nothing else than giving the enemy target saturation.
.
Other Icons: The icon of Nurgle can work well for both variants, but it costs 50 points, so I tend to leave it behind in order to take a more assault flavoured mark and it won't offer any extra protection from ordnance anyway. The mark of Tzeench is also expensive and a 5+ invul really doesn't appeal to me for what the Raptors are used for.
.
Deamon delivery system: Raptors can be a pretty mobile platform for delivering daemons, but if the daemons come in turn 2 it can be a waste and if they come in too late, then you want your other squads to have icons to make sure you can still get your daemons if the raptors die.
.
Overall: The Raptor can be a useful unit on the field, but tends to need cover support to get into place and tends to work better supprting other units. Our troops and heavy support tend to run expensive and can fill the role that the raptors provide pretty well, or in the case or Zerks (who can hold their own in assault) and Plaguers (who can hold their own and tand to have meltas), they don't really need Raptor support. They can be nasty and fun and warrant playtesting, but I tend to use their points for more troops and more long-range fire support.

Thursday, November 26, 2009

Happy Thanksgiving from DFG!

Surrounded, The Thanksgiving Turkey had no choice but to swear allegiance to the Dark Gods!
.
Happy Thanksgiving from the crew at Dark Future Games! Have a better caption, HIT IT UP!!

Wednesday, November 25, 2009

Bringing more Dudes to the Fight; your thoughts ...

Goat Boy over at BoLS had a pretty good article here: http://www.belloflostsouls.net/2009/11/goatboys-40k-thoughts-are-we-not_23.html Where he discussed the use of more troops. Now, before you go any further, he wasn't necessaritly talking about more troops, less transports (his revised list had plenty of transports), what he was talking about was more troop choices.
.
My question to you is two-fold; "Has the local gaming scene where you are made you more likely to add or subtract the amount of troop choices you take? How many troop choices do you usually field and at what points level?" Feel free to answer via comments and I will also have a poll available.

Monday, November 23, 2009

Great Khorne Forum: Throne of skulls!


As my Chaos Army begins to take a turn more and more toward the Blood God in both fluff and from a comp standpoint, I have been branching out to find a community forum where taking skulls and spilling blood is acceptable practice from its members and I have found ThroneOfSkulls.com a site dedicated to the Blood God, both 40k and Fantasy, CSM and Daemons.
.
There is a ton of user created art there and plenty of great finished projects and WIP (above art), some good old army list critiqueing and much, much more. Check them out at: http://www.throneofskulls.com/index.php

Quick brick and diarama tutorial from Arkanseth


Here is a quick link to Arkanseth's site, where he has a number of amazing tutorials and his own Golden Daemon models on display. Check it out and follow the link to the tut: http://akaranseth.over-blog.com/pages/Step_by_Step_Brick_Wall_in_plaster-360501.html

Sunday, November 22, 2009

Black Legion gets dusted off and a little revamp!


So this weekend I was cleaning the garage (and finally got it done) when my wife asked the question: "Just how much Chaos stuff do you have?"
.
I decided to take it all out and set it up on my gaming table. I quickly realized that I had to ditch the terrain so it could fit ... then I realized that there was a lot more there than I thought. In fact, I had 78 fully painted Black Legionnares that I had completely forgotten about, not to mention the epic amount of other cult troops, termies, my massive vehicle lot, the brass scorpions and defiler and yes ... the massive HQ section. Why don't I have a photo? I forgot to pull it out before I started putting it all away.
.
My wife's next question was "What the hell do you do with all that? I know you don't use it all."
.
This got me thinking ... I sure as hell don't. So I sat down and started writing lists and figuring out what to do with my stuff. Next thing you know, I have a pretty damn good dounding Khorne list drafted up, from 1500, 1750 and 2000. I figured out a ton of different lists that just all seemed to sing "TRY ME!!!"
.
Then I started looking at those poor Black Legionnares. I remembered how I used to drool over the idea of bringing the Warmaster's forces to bear with all the might of a Black Crusade, only to fall out of love with them for some Cult troops ... then an idea hit me ...
.
With new vigour, I began taking out the exact models I would need from my old legion and winced at the old flat gold and silver trim and weapons, so I hit them with red and black washes ... and it was good. I updated the basing and bought some flock (haven't used it yet) and it was good ... I started modeling new specialists and even painted the Bastion I am painting for the FLGS in Black Legion colors (will get a healthy wash tomarrow) ... all building up to something, something corrupt in the extreme ...
.
... but I am not going to tell you what yet. Just keep your eyes peeled for the new models I am building and you will see!

Outstanding Tyranid terrain video tutorial!


I found this great tutorial for creating Tyranid Terrain with a three part video guide from Blue Table Painting. It is really rather simple and with all the hub-bub about Tyranids coming back around, I figured this tut could come in handy for any Tyranid player who wants to create a full scale tyrannic invasion! Enjoy the videos and if you'd like to see more from Blue Table, visit their site at: http://www.bluetablepainting.com/


Friday, November 20, 2009

Chaos Space Marines Units and Tactics: Daemons!


Yes, Daemons! Well ... not quite ... we are going to talk about the Codex CSM Greater Daemon and the Lesser Daemons in this article.
.
First, before I talk about either of these units I want you to do three things for me, whether you play CSM or against CSM, if you run daemons or not, just do these three things for me:
.
READ PAGE 61 of the CSM Codex!, READ PAGE 61 of the CSM Codex! READ PAGE 61 of the CSM Codex!
.
Trust me, it needs to be said as many people do not understand the way either Daemon choice works. With that being said, let's move on to Lesser Daemons!
.
Bringing Lesser Daemons to the Fight: The Lesser Daemons are a unit that many people have mixed feelings about. I think they are pretty useful, but your army has to be built to accomidate their use. First and foremost, you will need icons in your army. This can be done cheaply with cult troops for 5 points a model or can be done with regular CSM with the Icon of Chaos Glory (Which they should have anyway).
.
This is important because if there are no icons on the board when they become available, the unit is destroyed: That's right, they have to DS within 6" of an icon, so having a few icons in your army is a must(depending on how many units of LDs you are taking and what you want to do with them).
.
What do my Daemons Do For Me? Your Lesser Daemons can work in both offensive and defensive set-ups. In the offense, LDs work very well as you can roll forward with your rhinos and hopefully get them in when you want them and assault the enemy from their deep strike (yes they can, read page 61!) They will have 3 attacks on the charge and can deepstrike up to 6" from the vehicle. But what if my vehicle gets blown up? Still good, as now they can hopefully turn up to deep strike and assault approaching enemy so you can get your charge in from your troop unit (works well with armies of Rhino mounted Berzerkers!). Beware, the enemy can mow down LDs most of the time, but if you use tandem tactics like this, then they will have to choose between killing your squad or the daemons (the easy kill or the tough guys) Either way, they are going to get beat down. This also works well with Plague Marine Squads and adds to their survivability very well.
.
In the defense, daemons work pretty well to hold onto objectives while your troops (who are better in a fist fight, move on to take care of would-be attackers and to consolidate onto enemy held objectives. This can be a very annoying tactic to play against as you have to get his troops off those objectives, but his real troops are moving around the board attacking you and keeping you from holding them. The fact that a player who employs this with multiple units of daemons also makes more targets, thus making it harder to clean all the objective in a 5 turn game. It also works in tak and hold missions because the enemy can assault in and even beat a squad of daemons, only to get charge by another squad ... and maybe he will still win, but then he gets attacked by another squad of daemons, see where this is going?
.
The key thing to remember in each situation is that your Lesser Daemons are not very tough and can get killed if not employed correctly. In kill point missions, you need to use mutual support and be careful to make the best use of them with the offensive tactics discussed earlier.
.
Greater Daemon Tactics: The Greater Daemon can be a pretty nasty unit to drop on the enemy, but comes at a price. The Daemon is deceptively priced at 100 points, but never forget that he also comes at the cost of am aspiring champion, who is a minimum 30 point model even at the cheapest possible option.
.
The Greater Daemon can be employed both offensively and defensively just like his little cousins. In the offense, there are a few tactics to employ:
.
The first one most people think of is the daemon bomb, where a unit of bikers boost across the board to deliver the Greater Daemon unto the enemy. The problems here lie in that the biker champ is expensive. The bikers themselves are not cheap and to kit the unit out for other purposes behind enemy lines is even more expensive. The most damning thing about it is that the greater daemon will be at the mercy of a full army while yours is still coming up, denying your 100 and something point bugger his propper mutual support. The gem of this tactic however, is that it takes the enemy's attention away from your daemon princes, obliterators and your other nasty units.
.
Another offensive means of getting the daemon to grips with the enemy is with your troops performing a rhino rush up the board. If he comes early, then he can stay behind the rhino way. If he comes on time, he can hold a unit in combat while your troops set up to assault from non-moving rhinos the next turn and if you are using true mutual support, then you will have daemon princes coming up to assault/lash ect.
.
The greater daemon also works out well in defense as his toughness 6 is great for holding his ground and his invul will help him against half the shots that can actually hurt him. The best thing about having him on the objective is that you won't have to use your daemon princes to guard your back objectives, they can run forward and do what they do best (sidtract the enemy and assault his lines).
.
Overall, the Lesser and Greater Daemons have their own merits. I could take or leave the greater deamon. I think I have enough monsterous creatures and I use my army in a way that doesn't fit the greater daemon so much. That being said, he can be handy, but you have to be mindful of what you are doing so as not to waste him. The lesser daemons I see as being a bit more useful for their points and many opponents underestimate their ability to deliver a nasty charge! The ability to hold objective also makes spamming small numbers of them fun for you (not for the enemy) and allows you to get your real force to the fight.
.
I suggest you playtest them and give them a shot. Try the tactics and come up with your own opinion. I like them! Let me hear what you think!

Blog of Note: Ricalopia! Check out his Lustgrinder!


If you have not seen it yet, then you have to take a look at the amazing Lustgrinder commission that Ricalope is working on here:http://ricalopia.blogspot.com/search/label/Commission
.
I have been following his project at Ricalopia since it began and stuff like this makes me glad I have a blog roll (I probably use mine more than my visitors do!). If you get the chance, stop over and let him know what you think!

Artist of the Week: Ana from Chest of Colors!


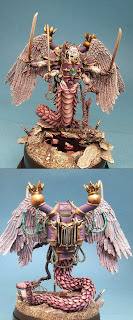
This Week's Artist of the Week is Ana from Chest of Colors! Amazing paintjobs all around, Golden Daemon work all over the place. These photos only scratch the surface, check out Ana's gallery on CMoN here: http://www.coolminiornot.com/browse/page/1/submitter/Ana/orderby/Descending

Thursday, November 19, 2009

Team DFG will attend Adepticon!!


It has begun! Dark Future Games will have full representation at Adepticon in Chicago! We wil be involved in the 4 man tourney as well as several other events during the weekend. Also be on the look out for folks from Evolution Games (we are rollin deep bitches!). As for what we will take to the 4-man tourney ... that is a secret older than the stars ...


Monday, November 16, 2009

Simple Abbadon conversion!


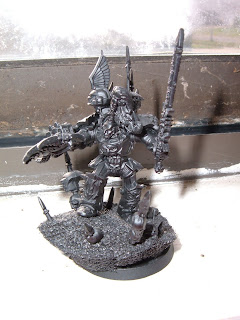
Old School here with a simple conversion to show off. I always thought that the Despoiler looked a little small in his pre-packaged state, so I wanted to make him bigger to fit the fluff that he is a big SoB. So I took his head, claw and sword hand and added them to the CSM Plastic Terminator Lord kit and took it a step further by adding him to a foam core base to look regal and commanding. Be on the look out for this model's WIP. If you have converted the Despoiler, send us a photo, we would be happy to post it!

Angels of Absolution Test Marine


Old School here,
I just wanted to post a photo of one of my AoA test Marines. I wanted to break up the straight white of the existing chapter colors with a little something green - reminiscient of the Dark Angels heretige. I also used rotting flesh as their color as they are supposed to be the color of bone. I think bleached bone is a little too tan and I don't believe anything in the 41st millenium is pure white. Let me know what you all think!

Sunday, November 15, 2009

Quick Link to great fire painting tut!


Hi all,
I have been pretty busy the last couple days and just wanted to drop this quick fire painting link to those of you who are interested. Also, we would love to see your fire-art, just send it to DarkFutureGames@gmail.com
.

Friday, November 13, 2009

Artist of the Week: Demonherald!!!


Old School here with the Artist of the week. This week's artists has created some of my favorite 40k peices from the amazing Ultra Marines Dreadnought conversion (made before the FW Ultra came out) to the incredible conversions used to make the Black Legion Jetbike. Click on the photos to see the larger images or check out his enormous gallery at: http://www.coolminiornot.com/browse/page/1/submitter/demonherald/orderby/Descending


Thursday, November 12, 2009

Svartmetall's 90's Plaguer Marine tutorial!

Old School here,
.
I have been a big fan of an exceptionally talented converter named Svartmetall for some time. If you have been around any of the big forums long enough, you may be familiar with his work, but if not, I would like to share this tutorial with you from the undistputed master of Nurgle himself. I won't send you to a specific Web site to find his work, just google search his name and you will find truly amazing work. Here is his guide to creating an old-school looking plague Marine from bitz and green stuff:
.
Old School Plague Marine Tutorial(or, My Head Got Cut Off And Used As A Blight Grenade And All I Got Was This Lousy T-Shirt)
.
The idea behind this tutorial is to show how you can convert one of the current plastic Chaos Space Marines into an old-school style Plague Marine – I like the bulbous 90s-style Death Guard models, but they’re pretty hard to find these days and since I wanted to have an ‘old school’ squad of this style of model it seemed like a good idea to work out how to convert one of the ‘normal’ CSM models into something as close as I could manage to the Plague Marines of yesteryear. Here’s the fine figure of an old Plague Marine miniature that will be serving as inspiration, and the bog-standard plastic bits that will form the basis for this conversion:
First of all, trim the mould lines and assemble the basic body parts; I put a 2mm spacer in at the waist joint to give the model extra height (as I like my Nurgle troops to be huge and hulking) and also to give the overall figure more balanced proportions. I filled around this spacer with green stuff to make the joint more solid.

Before putting on the front half of the torso I removed the bottom half of it, the better to accommodate the augmetic cabling that will be going there. It doesn’t matter what torso front you use, because we’re aiming for a very smooth rounded chest so you’ll need to sand any details on it flat anyway. Then I used a pin drill to make holes ready for the augmetic cabling – be careful drilling these, as they need to be at the correct angle for the ‘lay’ of the cable; a bit of forward planning is needed here in terms of how much cabling you want and where you’re going to put it - there’s no harm in making sketches if you need to. Then I stuck a gob of green stuff inside the lower torso cavity and made a hole in it ready for yet another bit of cabling, with a corresponding hole in the right leg.
.
Drilling holes in the head was tricky, and again these have to be at the right angle for where you eventually want the cabling to sit; never be afraid to stop and stick a bit of guitar string into a hole to check it’s at the right angle before going any further.


Once the green stuff on the torso has set, you’re ready to start inserting the augmetic cabling; I generally use guitar strings for this, as the windings look right for augmetics even down at the 28mm scale. A .032” gauge guitar string is just the right diameter to work with the hole made by the default bit that comes with the GW pin drill, and that’s what I used on this model.


You need to bend each piece of string so it fits properly on the model, and the cable which goes from the leg into the lower torso is a good example of this; ideally you’re aiming for a smooth, natural-looking curvature of the cable. That piece has a gentle-ish curve that can be done with fingers, but for some pieces you’ll need a much sharper curve for which you’ll probably need to use a pair of needle-nose pliers and a little practice to get the feel of how to bend it to the right shape.
.
The cables that go around to either side of the torso are a good example of this; eventually they’ll be covered by the shoulderpads so they need to sit tight to the side so they don’t stick out too much. Be careful when bending string with pliers as the windings can sometimes stretch apart, which spoils the look of the cabling; try to keep the ‘wrap’ of the windings around the guitar string’s core as even as you can. Use a small dab of glue on the end of the string as each end is inserted to keep it firmly anchored in place.Possibly the single fiddliest part of this whole conversion was getting the head attached with the cable that runs from the helmet into the upper chest at the right angle; several tries were needed, and swearing occurred, before the helmet was mounted firmly with the cable going smoothly from it into the chest.


Phew. Tricky, but now it felt like it was starting to get the feel I was after. You can also see now how the spacer at the waist joint gives a nice overall proportion to the figure; it’s not strict true-scale, but looks the part nonetheless.And now it’s green stuff time. I seriously debated using one big lump of green stuff to make the rounded torso, but given the various bits of cabling going into it at various spots the only way
.
I found that worked to get the desired bulbous look was to use several smaller bits and smooth them together; this made it a lot easier to leave gaps for the cabling to pass through into the body. The idea was always to give the finished model as much depth as possible, so the detail seemed to go right into the body and not just sit on the surface.
.
Where two different pieces of green stuff needed to blend smoothly, I used a wetted thumb to get a seamless transition. In some cases you still get a very tiny line, but for Nurgle armour this doesn’t look out of place at all; it almost looks like marbling.


Note the profile shot; as I was building up the layers of green stuff I kept checking the overall shape of the torso from all angles to make sure I was keeping the curve smooth and even. The gaps where the cabling passes into the torso don’t all have to look the same; I chose to have a large gaping cavity where the cabling from the leg enters the torso, with cracks across the armour’s surface spreading out from this. By contrast the cabling at each shoulder and from the head have quite smooth holes. I also left a jagged hole in the lower left of the belly for that authentic Nurgle look, and added two kneepads of green stuff to match the old-school Plague Marine’s detail. Following on from this, once the front had cured hard I added green stuff texturing all round the back of the model, so the bloated belly would blend in both in terms of dimensions and detailing with the overall profile of the model.
.
There’s a deep recessed gap inside the smooth edge of the belly, which is again intended to give the impression of depth to the model. The rest of the green stuff work on this part of the model’s back is made up of a stretched-tissue type of texture; remember that much of what goes here will be at least slightly obscured by the backpack, so keep it flat enough to the body for the backpack to sit correctly.


Also, from this angle you can see the bits of cabling sticking round the sides of the torso from the chest and the helmet; next we’ll deal with those and attaching the arms.I used a file to smooth down the edges of the cabling that were sticking out, then put a 1mm spacer in at each arm joint so there was an overall flat surface for the arms to mount onto.


The choice of weapons is of course up to you; I’ve always thought that chainswords feel perfect for Death Guard, very brutal and no-nonsense, and the bolt pistol also works with the close-combat feel. Once the arms were glued on and set, I added more green stuff stretched-tissue around the circumference of the arm joint, some of which stretches over to the backpack mount or joins the tissue reaching up from the lower back.
.
The more your green stuff work looks homogenous to the model, the better, and one of the best ways to do this is to keep it unified all over the model and where necessary to match any of the model’s original texture and surface detailing. Also at this point I smoothed in the kneepads and, as you can see on the left knee, blended the line of the model’s leg into the kneepad itself so it looks like a part of the model; the last thing you want to see on any miniature is something that screams here is the green-stuffed part because it doesn’t match or blend in with the actual model. Ideally you shouldn’t be able to tell what’s original and what’s conversion once it’s painted up; I actually find that one of my favourite stages with any converted model is after the basic primer or undercoat has been applied, as it’s then that everything is finally the same colour and you can see how well what you’ve added to the model blends in with the rest of it. As a final touch I added a tiny worm (or possibly piece of gut) sticking out of the hole in the lower left of the belly.
.
Finally, on goes the backpack, and some more green stuff was inserted around and behind this to blend it in with the main body. And, of course, the finishing touch for that authentic ‘old school’ Plague Marine look – a spike on top of the helmet.


I also added some tiny splurges of stretched-tissue green stuff around the boots, and at the elbow joints on the arms. These are just little details but they add to the overall visual unity of the model, making it all look like it belongs together.And here’s the finished result:


It’s quite a lot of work for one troop model, but a full unit of these guys looks pretty nifty lumbering across the battlefield.

Tuesday, November 10, 2009

White Scars: Building a Successful Army List


Master of the Forge in full servo-harness riding a bike

Un-Phasable here,

White Scars are an entertaining army for many reasons the most important being they are challenging. Given the relatively low model count in your army, you must be cunning when you command them. Since they will almost always be outnumbered, any mistakes made will be amplified and occasionally may cost you the game. That being said, they are certainly a competitive army and success is very rewarding and never out of reach.

One of the most important concepts to remember with the White Scars is your model count. If you build a 1500 point list and only have 15 models you have a problem. You would only be making victory easier for your opponent. You want to have models to wage war with. Don't get me wrong, it is certainly possible to pull off a victory with very few expensive models rather than more numerous not as expensive models. Just keep in mind your army will not be as balanced or as effective the fewer models you include. Now when I talk about model count I'm referring to models that can move and shoot. This includes bikes of course, but also includes transports (not Drop Pods), Dreadnoughts, and the models inside transports, non-transport vehicles, or any other models on foot (even though I don't take models on foot). Typically I will hold a higher priority for models that are also capable of assault since that makes them more versatile.

I include transports for two main reasons; they act almost as moving terrain that I control, and can block line of sight and provide cover to my precious bikes while simultaneously providing protection for the troops inside. Transports are important for the White Scars since you want everything to be capable of moving at the same speed; i.e. at least 12 inches a turn. White Scars are meant to be fast, Dreadnoughts are the only exception to this rule. That is why whenever I include them in a list they receive a Drop Pod, this way they are where you need them early in the game, in fact often before the bikes even arrive. Since I play White Scars with the traditional approach I never take models on foot unless they are given a transport (even Devastator Squads), everything must be mounted. When playing this way, you will always be more mobile than your foe. This will make it easier to pick your favorable battles, and seize objectives when the time is right.

Why is the model count so Important: Well, the short answer is the more you have to work with, the more possibilities you have on the battlefield. You do not want to make victory easier for your opponent by making yourself severely outnumbered. I will always count the number of models in a list before I consider trying it. If it meets my expectations I add it to the large folder of army list possibilities I have for my White Scars. I try not to play the same list twice in a row, because as you all know the Space Marines have tons of options. This helps to keep my opponent guessing, and also makes each game exciting. It's fun to have 50+ "take all comers" lists ready at any given time, although it may be a little bit excessive.

A good rule of thumb I have come up with: When I make an army list for White Scars I will typically expect approximately 30 models for 1500 points give or take a few. For 1750 points I would expect about 35-40 models. It is certainly satisfactory to have more than my guidelines suggest would be appropriate, however a red flag should go up if you have significantly less then expected with this guideline. For every high cost single model unit you include, such as a Dreadnought or Predator, you will likely need to balance it out with a less expensive per model unit such as a Tactical Squad. This will help to provide balance in your force and also help to ensure you will not be too outnumbered that you cannot overcome it. Don't get me wrong, this is not an exact science, it is merely a guideline. But remember even when I play nothing but bikes with my Scars I still have 32 models at 1500 points. The fewer high points cost models you include, the more bikes you can fit into the army.

As always feel free to comment or ask questions.

A moment for Veterans and for the fallen

Old School here,

I just wanted to take a break from the usual 40k talk to give thanks to my fellow brothers and sisters in arms across the world and to all those who have served or who have given their lives in battle. I sincerely appreciate the daily efforts and the sacrifice made by the U.S. military and our allies as well as their family members. Not only is tomarrow Veterans' Day, but 234 years ago today, the United States Marine Corps was born. Semper Fidelis and have a great Veterans' Day!


I would also like to take a moment for our Missing in Action and Prisoners of War. In almost any gathering of military personnel, you will find a table dedicated to those missing. The narrator will call for a moment of silence and recite the following in their memory:
.
You may notice this small table here in a place of honor. It is set for one. This table is our way of symbolizing that members of our profession of arms are missing from our midst. They are commonly call P.O.W.'s or M.I.A.'s, we call them brothers.
.
They are unable to be with us this evening and so we remember them.
.
This table set for one is small... it symbolizes the frailty of one prisoner against his oppressors.
.
The table cloth is white... it symbolizes the purity of their intentions to respond to their country's call to arms.
.
The single rose displayed in a vase reminds us of the families and loved ones of our comrades in arms who keep faith awaiting their return.
.
The red ribbon tied so prominently on the vase is reminiscent of the red ribbon worn on the lapel and breasts of thousands who bear witness to their unyielding determination to demand a proper accounting for our missing.
.
A slice of lemon is on the bread plate... to remind us of their bitter fate.
.
There is salt upon the bread plate... symbolic of the family's tears as they wait.
.
The glass is inverted... they cannot toast with us tonight.
.

The chair is empty... they are not here.
.
Remember... all of you who served with them and called them comrades, who depended on their might and aid, and relied on them... for surely... they have not forsaken you.