TJ here with Tutorial number 2 for Speedpainting Daemons for a quality finish, unlike stereotypical speedpainting, which usually looks terrible. I recenlty painted up 20 horrors and 20 plague bearers in 8 hours, roughly 2 hours per squad (though I painted them all at once) and wanted to share the method with everyone, so, if you missed the first part of the tutorial, it published on December 8th (I cannot link it bacause I am at sea and this is a scheduled post), but for those who already read it, let's dive right in.
Alright, now we are going to step that brush size down once more notch and paint some grey onto the little platform rocks hidden in the maggot bases.
With that done, just make sure you didn't make any grey maggots.
Next is the glowing green swords. Bright colors don't work for everybody, but if you want green swords, bright or dark, then you need to start by painting the swords Dark Angels Green. Feel free to use the same size brush you used to drybrush the maggots (just be careful not to paint the plague bearers hand green). Paint the whole blade on each sword.
Next we will leave the swords and pick up our Genestealer Purple. We will use this to paint all the tongues on the Horrors and all the exposed guts and muscles on the Plague Bearers. I also add it around some of the sores and some of the mouths on the Plaguebearers so you can build up a bruised effect later
It should look like this when you are finished.
Here is an overexposed shot to help you see.
Here is a side shot at the tongues.
Alright, with the purples in place, it is time to bounce back to the swords and finish these badboys. I am pretty confident with my paint, so I did a sloppy blend on the sword to make them look phlem-ish in tone, basically hitting the edges and surrounding area, then moving to the next color, but covering less, then touching the very edges with Flash Gitz. If you aren't comfortable with that. Use the drybrush techniques on the swords and you will still get a nice inner glow effect.
Now, I am going to move back to the areas we painted purple and hit them with the Leviathan Purple (or the new purple shades). You need to go easy so it doesn't just flow everywhere. It needs to stay on the purple areas (and when working on the bruised areas, be even more light and careful).
Now you need to go in and paint all the bracelets, rings and such on the horrors with Runelord Brass. Also, hit the little rings on the sword handles for the Plague Bearers. You should still be able to do this with a fairly large brush, but you can step down to a smaller one if you aren't comfortable.
Now, since I was about to go to bed at this stage in the painting process, I decided to wash my bases. BE HEAVY with this one, so you actually add some shade to the deep recesses. Liberally apply Agrax Earthshade to each base and let it dry.
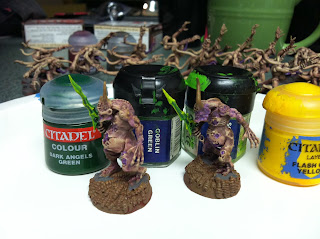
SO here we are, watching paint dry at the bottom of the second tutorial and the models should already look like they are coming together.


Those look great! I think your version of speed painting is pretty close to my normal painting method. I feel that this method is perfect for everything but centerpiece models and the results speak for themselves. Good work!
ReplyDeleteDoes that horror have it's head on upside down? =P
ReplyDeletehuh....so thats how you are cranking them out so fast. I may need to do this in January............
ReplyDelete