At adepticon this year I was able to meet a lot of people from around the blog sphere and see in person the models I have only been able to see online. A very common theme was these look so much better in person! Which brings me to this post; light boxes.
I'm just going to briefly go over my light box and hopefully show how simple it can be to have one to take pictures in to help bring across that 'real life' image of your models.
To start with, your lighting is the most important. A natural light, towards the blue side of the spectrum is generally better than your standard light bulb which is almost always in the yellow spectrum and glazes a yellow over your colors and distorts the work. The shots I took for this were on my phone since I left my camera in a friends car over the weekend, and they make it look a lot more yellow than it really is.
I'm a big fan of the LED lights and with the cost of them coming down, it really helps bring up the quality of your box without breaking the budget.
One thing my box lacks that I have seen and like in others is a light filter. Most people will just put a piece of white tissue paper over the light to diffuse it and stop it from having a spot light effect on your models. I have mine up high enough that it usually diffuses enough that I don't have problems with the light making my models look 'hot'
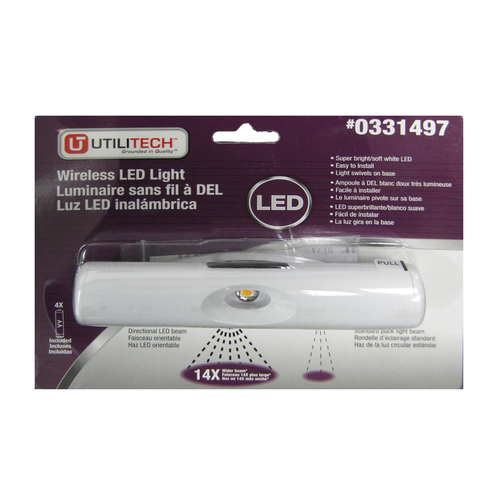
My intention with this is not to show you how to make a light box but just to encourage the community to use them over flashes on your camera. Here is the light I use, it was 13$ and though it could be better, this box only cost me the cost of the light. It was 13$ and really changed how my models photographed and made it so much easier to just pull out the box, throw my models in there, snap some shots.


Very cool! The idea is VERY cool an seems easy an inexpensive. To alleviate the shadows (as you point out... the hotness), I suggest getting TWO more lights to complement the one above. Put one on each side, in the 'front' of the box pointing 'back'. Because they are at an angle, you will end up with 'opposite' bright sources that cancel each other's produced shadows.
ReplyDeleteAnyhow... VERY nice! I will have this in mind as I have to rebuild my light box. THANKS!!!
I was under the impression light boxs had side lighting as well....just used gauss or white cloth to diffuse light
ReplyDelete